
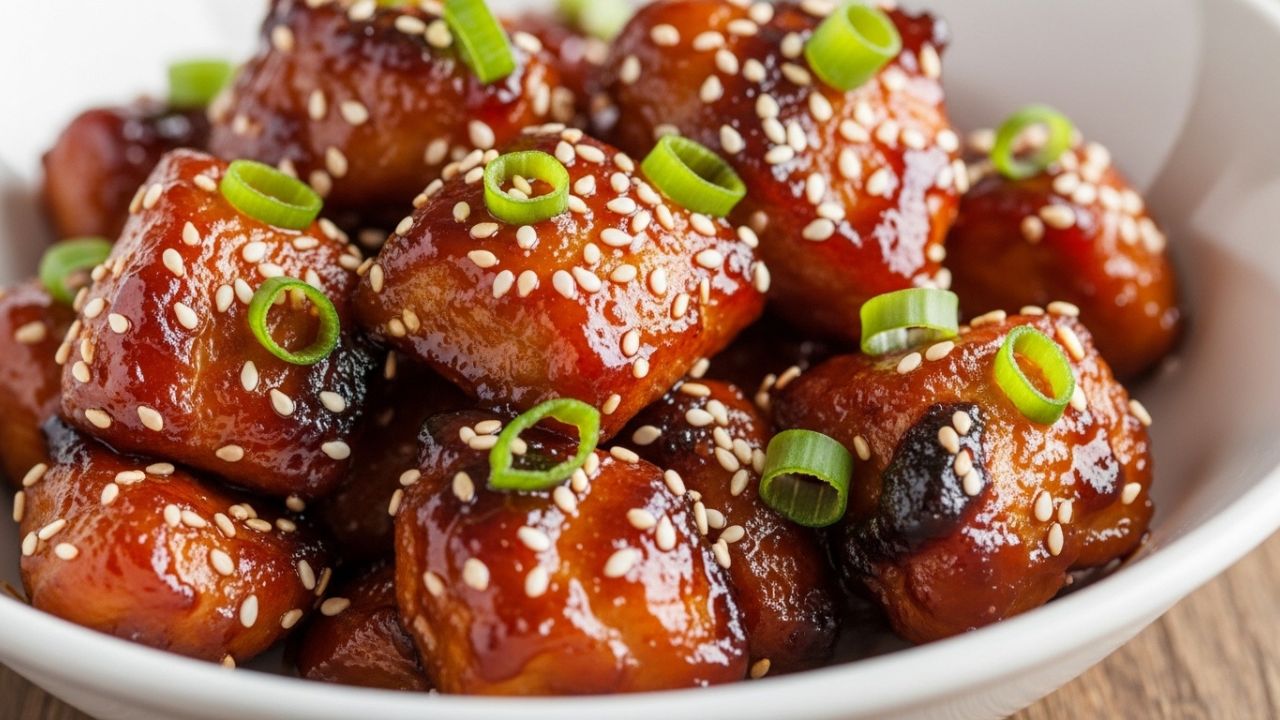
There is a specific kind of culinary magic that happens when soy sauce, ginger, and sugar meet a hot pan. If you’ve ever walked through a shopping mall food court or sat at a bustling Japanese hibachi grill, you know that intoxicating, sweet-and-savory aroma. It’s comforting, nostalgic, and universally loved. However, for a long time, many of us believed that the only way to get that perfect, glossy finish was to buy a pre-made bottle from the store or order delivery. I’m here to tell you that Homemade Teriyaki Chicken is not only possible at home—it’s significantly better. When you make your own sauce, you control the salt levels, the sweetness, and the punch of the aromatics. No mystery thickeners, no excessive preservatives, just pure, balanced flavor.
This recipe is designed for the home cook who wants a ‘win.’ Whether you’re looking for a reliable 30-minute weeknight meal, a meal-prep staple, or perfect homemade desserts like Cake in a Can to pair with your meals, this is your new go-to. Let’s dive into how to transform humble chicken thighs into a sticky, caramelized masterpiece, while exploring fresh herbs for cooking to elevate the flavor.
The Essentials Gathering Your Ingredients
The beauty of this dish lies in its simplicity. You likely have most of these items in your pantry already. If not, they are staples that will serve you well in dozens of other Asian-inspired recipes.
For the Chicken
- Chicken Thighs (1.5 lbs): I highly recommend boneless, skinless thighs. They stay juicy under high heat, whereas breasts can dry out quickly.
- Cooking Oil: Use a neutral oil with a high smoke point, like avocado, canola, or vegetable oil.
- Salt and Pepper: Just a pinch to season the meat before searing.
For the Signature Teriyaki Sauce
- Soy Sauce (1/2 cup): This provides the salt and depth. For a lower-sodium version, you can swap in tamari or liquid aminos.
- Mirin (1/4 cup): A sweet Japanese rice wine that gives the sauce its iconic luster.
- Honey or Brown Sugar (3-4 tbsp): This provides the sweetness and helps with the caramelization.
- Fresh Ginger (1 tbsp): Grated finely. Fresh is non-negotiable here!
- Fresh Garlic (2 cloves): Minced or pressed.
- Rice Vinegar (1 tbsp): A touch of acidity to cut through the sugar.
- Cornstarch Slurry: 1 teaspoon of cornstarch mixed with 1 teaspoon of water (optional, for a thicker glaze).
From Pan to Plate: Step-by-Step Instructions
1. Prep the Protein
Start by patting your chicken thighs dry with paper towels. This is a crucial step—moisture is the enemy of a good sear. Cut the chicken into bite-sized pieces (about 1-inch chunks). Lightly season with salt and pepper, keeping in mind the soy sauce will add plenty of salt later.
2. Searing for Flavor
Heat your oil in a large skillet or wok over medium-high heat. Once the oil is shimmering, add the chicken in a single layer. Don’t overcrowd the pan; if necessary, cook in two batches. Let the chicken sit undisturbed for 3-4 minutes to develop a golden-brown crust before flipping. Cook until the chicken is nearly done (internal temperature of 165°F as per USDA food safety guidelines). Remove the chicken from the pan and set aside.
3. Creating the Glaze
In the same pan (don’t wash it! those brown bits are flavor), turn the heat down to medium. Add the garlic and ginger, sautéing for about 30 seconds until fragrant. Pour in the soy sauce, mirin, honey, and rice vinegar. Use a wooden spoon to scrape the bottom of the pan.
4. The Reduction
Let the liquid come to a gentle simmer. If you prefer a very thick, sticky sauce, whisk in your cornstarch slurry now. Let the sauce bubble for 2-3 minutes until it starts to thicken and looks glossy.
5. The Marriage
Add the cooked chicken back into the skillet. Toss vigorously to ensure every piece is cocooned in the dark, amber glaze. Let it cook for another minute so the sauce clings to the meat.

Professional Tips for a Flawless Finish
- The Dry Secret: If you want extra crispy edges, toss your raw chicken pieces in a tablespoon of cornstarch before frying. This creates a light breading that the sauce clings to beautifully.
- Fresh vs. Powder: While ginger powder works in a pinch, fresh grated ginger provides a zingy heat that defines high-quality Homemade Teriyaki Chicken.
- Don’t Burn the Sugar: Because of the honey and brown sugar, the sauce can go from caramelized to burnt quickly. Keep the heat at a steady medium once the sauce is in the pan.
Serving Suggestions Making it a Meal
This chicken is a superstar, but it needs the right supporting cast.
- The Classic Base: Serve over a bed of fluffy jasmine rice or brown rice to soak up the extra sauce.
- The Low-Carb Route: Cauliflower rice or a simple zesty cucumber salad works wonders to balance the richness.
- Vibrant Veggies: Steam some broccoli, snap peas, or carrots. Tossing the vegetables directly into the pan at the end is a great way to get them coated in the glaze.
- Garnish: Never underestimate the power of toasted sesame seeds and thinly sliced green onions. They add texture and a pop of color that makes the dish look restaurant-quality.
Storage and Reheating Guide
Homemade Teriyaki Chicken is a dream for meal prep.
- Fridge: Store in an airtight container for up to 4 days.
- Freezer: You can freeze the cooked chicken in its sauce for up to 2 months. Thaw overnight in the refrigerator before reheating.
- Reheating: To keep the chicken tender, reheat it in a skillet over low heat with a splash of water or chicken broth to loosen the sauce. Microwaving is fine, but do it in 30-second intervals to avoid rubbery chicken.

Customizing Your Teriyaki
Don’t feel boxed in by the traditional recipe!
- Spice it up: Add a teaspoon of Sriracha or red chili flakes to the sauce for a Spicy Teriyaki vibe.
- Fruit Infusion: Some traditional recipes use pineapple juice instead of part of the sugar for a tropical, tangy sweetness.
- Vegetarian Option: This same sauce works perfectly with extra-firm tofu or tempeh.
Final Thoughts
Making Homemade Teriyaki Chicken is a reminder that some of the best meals are the simplest ones. It’s a dish that appeals to kids and adults alike, fits into a busy schedule, and uses ingredients that won’t break the bank. Once you see how easy it is to whisk together that glossy glaze in your own kitchen, those takeout menus might start gathering a bit of dust. If you’re craving more vibrant and flavorful dishes, check out The Purple Onion Menu for inspiration.
FAQ’s
1. Can I use chicken breast instead of thighs?
Yes, but be careful not to overcook them. Breasts lack the fat content of thighs and can become dry quickly once the sauce begins to reduce.
2. Is Mirin absolutely necessary?
Mirin adds a unique fermented sweetness and shine. If you can’t find it, you can substitute it with dry sherry or a mix of rice vinegar and an extra teaspoon of sugar.
3. Why is my sauce too salty?
This usually happens if the soy sauce reduces too much or if you used a dark soy sauce (which is much more concentrated). Use Low Sodium soy sauce if you are sensitive to salt.
4. How do I make the sauce thicker?
The slurry is your best friend. Mix equal parts cornstarch and cold water, then whisk it into the simmering sauce. It will thicken almost instantly.
Henry James is the writer behind Fooodies.site, where he shares easy recipes, practical cooking guides, and simple kitchen tips for everyday home cooks. He enjoys experimenting with flavors and turning everyday ingredients into delicious, homemade meals. His goal is to make cooking feel simple, enjoyable, and achievable for everyone. He focuses on creating clear, well-tested content that readers can trust and follow with confidence.