
There is a specific kind of heartbreak known only to bakers: looking at a beautiful, multi-layer masterpiece or a simple, tender snack cake and realizing it won’t be finished before it goes stale. In my early years of baking, I used to think that the cake freezing was the enemy of texture—a place where moisture went to die and “freezer burn” was an inevitability. I was wrong.
After years of testing various methods in a humid home kitchen, I’ve discovered that the freezer is actually a baker’s best friend. Whether you are prepping layers for a wedding three weeks in advance or just saving two stray slices of chocolate Guinness cake, the secret lies in the science of the seal. If you do it right, a thawed cake can actually taste moister than a fresh one because the freezing process locks in the existing humidity. If you’re looking to expand your repertoire beyond the freezer, feel free to explore more easy dessert recipes on our site.
The “Ingredients” for Successful Freezing
While we aren’t “cooking” the freezer process, you need specific supplies to act as your ingredients for success. Using the wrong wrap is the quickest way to end up with a cake that tastes like frozen peas and old ice cubes.
- Plastic Wrap (PVC or PE): You need a high-quality, clingy wrap. In my experience, the cheaper, thinner wraps tend to tear, allowing air to seep in.
- Aluminum Foil (Heavy Duty): This acts as the secondary barrier. Plastic wrap keeps the moisture in; the foil keeps the freezer odors out.
- Cardboard Cake Rounds: If freezing whole layers, these provide structural support so the cake doesn’t flex and crack.
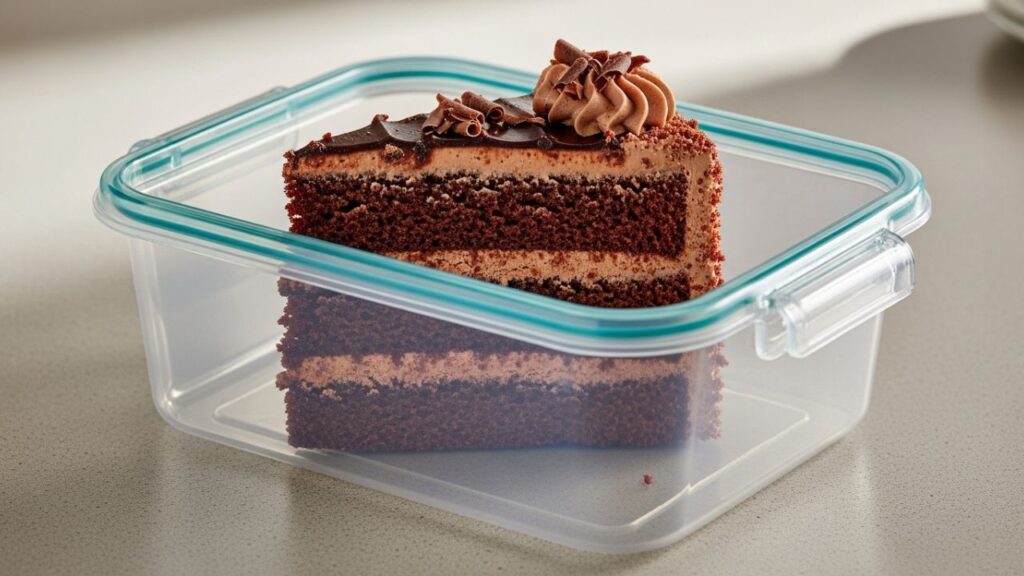
- Airtight Containers or Freezer Bags: For slices, a rigid container prevents the cake from being squashed by a bag of frozen spinach.
- Masking Tape and a Permanent Marker: Trust me, “unidentified brown circle” is a common freezer mystery. Label everything with the date and flavor.
Why Quality Wrap Matters
The science here is simple: sublimation. This is when ice turns directly into vapor without becoming liquid. If your cake isn’t wrapped tight, the ice crystals on the surface evaporate into the dry freezer air, leaving behind those dry, grey, “burned” patches. A double-layer defense is your only protection.
Step-by-Step Method for Freezing Cake Layers
This is the gold standard for professional bakers. If you want to make a birthday cake on a Tuesday for a Saturday party, follow this method.
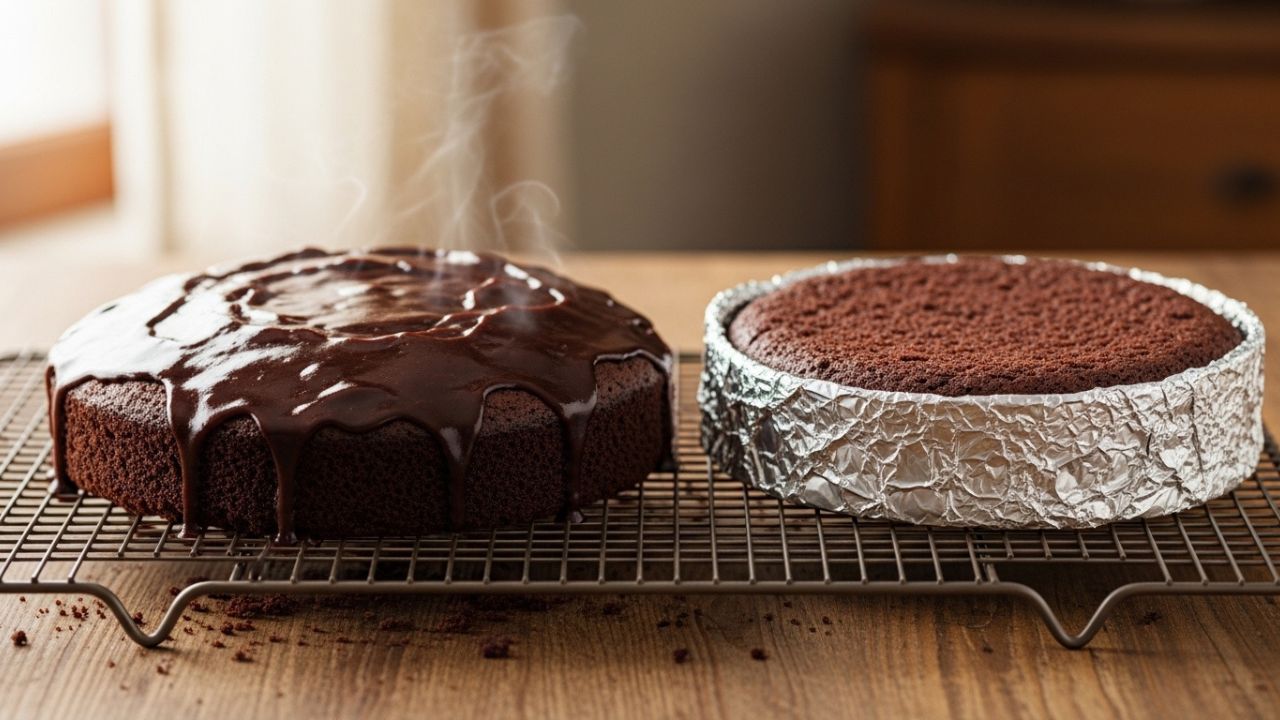
1. The Critical Cooling Phase
Why it matters: Never, ever wrap a warm cake. If you trap steam inside the plastic wrap, it will condense into water droplets as it cools, leading to a soggy, gummy exterior and potential mold growth.
- The Trick: I’ve found that leaving the cake on a wire cooling rack for at least 2 hours is essential. The bottom needs to be as cool as the top.
2. The Initial “Flash” Chill
Why it matters: To make the cake easier to handle without it crumbling or sticking to the wrap.
- The Method: Once the cake is at room temperature, place the unwrapped layer on a parchment-lined sheet pan in the freezer for 20–30 minutes. This firms up the delicate crumb and makes it much easier to wrap tightly without deforming the edges.
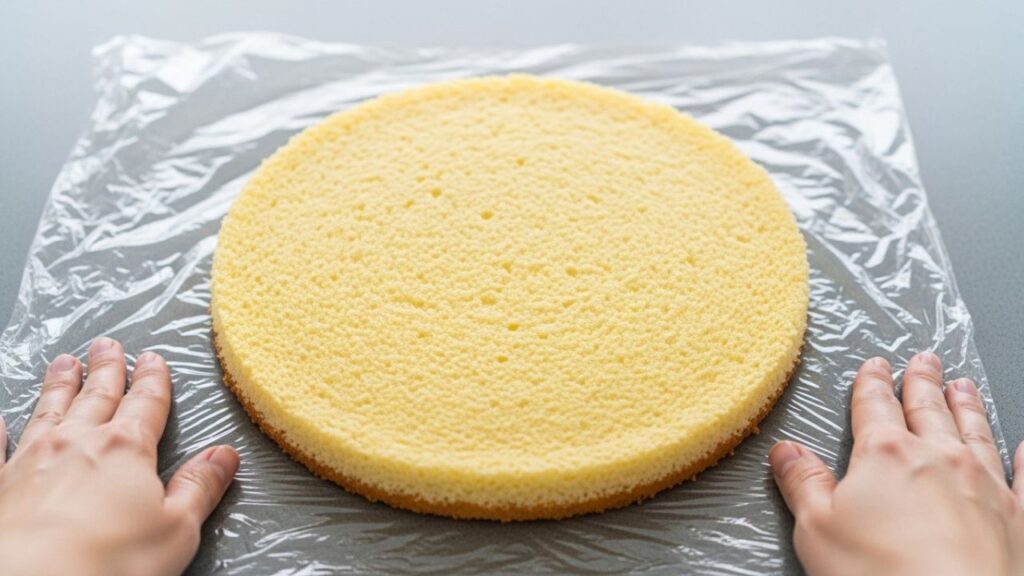
3. The Double-Wrap Seal
Why it matters: This is where you prevent freezer burn.
- The Method: Place your chilled cake layer on a cardboard round. Wrap it in two layers of plastic wrap, going in opposite directions (horizontal then vertical). Finish with a final layer of heavy-duty aluminum foil.
- Visual Cue: The cake should look like a silver puck. You shouldn’t see any gaps or “bubbles” where air is trapped against the surface of the sponge.
4. Flat Storage
Why it matters: Cake layers are surprisingly fragile until fully frozen.
- The Method: Store them on a flat surface in the freezer for the first 24 hours. After they are frozen solid, you can stack them to save space.
The Science of Starch Retrogradation
To understand why cakes freeze so well (and why they go stale), we have to look at Starch Retrogradation. When a cake is baked, the starch granules in the flour absorb water and swell (gelatinization). As soon as the cake leaves the oven, those starches begin to realign into a crystalline structure, pushing water out. This is what we call “stealing.”
The freezer effectively “pauses” this crystalline realignment. By dropping the temperature below the freezing point of water quickly, you stop the starch from pushing moisture away. Interestingly, the refrigerator is actually the worst place for a cake; the temperatures just above freezing (around 35°F to 40°F) actually accelerate the staling process. If you aren’t eating it today, skip the fridge and go straight to the freezer.
5 Common Mistakes (And How to Fix Them)
1. Freezing with Delicate Garnishes
The Mistake: Trying to freeze a cake decorated with fresh berries, delicate macarons, or whipped cream.
The Result: Berries turn to mush upon thawing; whipped cream can weep and separate.
The Fix: Freeze the cake and buttercream, but wait until the day of serving to add fresh fruit or fragile toppings.
2. The “Slow Thaw” Blunder
The Mistake: Taking a wrapped cake out and letting it sit on the counter until it’s room temperature before unwrapping.
The Result: Condensation forms inside the wrap, making the surface of the cake sticky or “sweaty.”
The Fix: Take the cake out of the freezer, remove the foil and plastic immediately, then let it thaw. This allows the surface moisture to evaporate naturally rather than soaking back into the crumb.
3. Neglecting the Cake Board
The Mistake: Freezing a soft sponge cake directly on a wire rack or uneven surface.
The Result: The cake freezes with a permanent “wave” or “dip” in it, making it impossible to stack evenly later.
The Fix: Always use a rigid cardboard cake round or a flat plate during the initial freezing phase.
4. Poor Labeling
The Mistake: Thinking you’ll remember which one is “Lemon” and which is “Vanilla” three months later.
The Result: Serving the wrong flavor or eating a cake that is well past its 3-month prime.
The Fix: Use a permanent marker on the foil. Note the flavor, the date, and whether it was soaked in simple syrup.
5. Freezing “Dry” Cakes
The Mistake: Freezing a cake that was already a bit overbaked.
The Result: Freezing preserves what is there; it doesn’t add moisture. A dry cake will come out even drier.
The Fix: If you suspect a cake is dry, lightly brush it with a simple syrup (one part sugar, one part water) before freezing. This adds a moisture buffer.
Storage & Make-Ahead Guidance
- Room Temperature: Most cakes (without perishable fillings like custard or fresh fruit) are good for 2–3 days on the counter in an airtight container.
- Refrigeration: Avoid it for long-term storage unless the frosting requires it (like cream cheese or ganache). Limit to 24–48 hours.
- Freezing: This is the gold standard for make-ahead baking.
- Unfrosted Layers: Best used within 3 months.
- Frosted Slices: Best used within 1 month.
- Texture Changes: After 3 months, you may notice the fat (butter) starts to take on “freezer smells,” and the crumb may become slightly more crumbly.
For food safety guidelines on maintaining proper freezer temperatures to prevent bacterial growth, you can refer to the USDA Food Safety and Inspection Service for comprehensive storage charts.

4 Serving Suggestions & Variations
1. The “Ice Cream” Slice
Instead of thawing your frozen cake slices completely, try eating a dense chocolate or fudge cake while it’s still semi-frozen. The texture becomes remarkably like a premium ice cream bar.
2. The Trifle Transformation
If you have frozen cake scraps or layers that didn’t thaw perfectly, cube them up! Layer the frozen cubes with fresh custard and berries. As the cake thaws inside the trifle, it absorbs the cream, creating a melt-in-your-mouth dessert.
3. Toasted Pound Cake
Frozen pound cake slices are a revelation. Throw a frozen slice directly onto a buttered griddle or into a toaster oven. The outside gets a caramelized crunch while the inside stays moist and tender.
4. The “Chilled” Layer Build
One trick I always use: assemble your layer cake while the sponges are still about 50% frozen. They are much sturdier, produce fewer crumbs (no need for a heavy crumb coat!), and the frosting sets up instantly upon contact, keeping your layers perfectly straight.
Conclusion
Mastering the art of freezing cake is one of the most liberating skills a home baker can acquire. It removes the stress of “day-of” baking and ensures that no hard work ever goes to waste. In my experience, the difference between a mediocre thawed cake and one that tastes better than fresh comes down to the quality of your seal and the patience you show during the cooling process.
I’ve found that when you treat the freezer as a preservation tool rather than a storage bin, the quality of your bakes remains incredibly high. Whether you’re prepping for a major celebration or just saving a slice of Sunday’s treat for a rainy Tuesday, do it with intention. Wrap it tight, label it well, and always thaw with the wrappings off. You’ll be amazed at how fresh a “month-old” cake can truly taste.
SEO-Friendly FAQs
1.Can you freeze a cake with cream cheese frosting?
Yes, but with a caveat. Cream cheese frosting has a high fat and moisture content, which can sometimes result in a slightly grainy texture after thawing. To minimize this, ensure the frosting is well-aerated during the initial making and thaw the cake slowly in the refrigerator before bringing it to room temperature.
2.How long does it take for a frozen cake layer to thaw?
A standard 8-inch cake layer usually takes about 2 to 3 hours to thaw at room temperature. If you are thawing a whole, fully decorated cake, it is best to let it sit in the refrigerator overnight to ensure the center isn’t still an ice block when you go to slice it.
3.Can I freeze a cake twice?
It is generally not recommended. Each time you freeze and thaw a cake, you lose moisture and compromise the cellular structure of the crumb, leading to a dry, crumbly texture. It’s better to freeze in individual slices so you only thaw what you need.
4.Do some cakes freeze better than others?
Absolutely. High-fat cakes like pound cake, butter cakes, mud cakes, and carrot cakes freeze beautifully. Delicate, low-fat cakes like Angel Food or chiffon can be frozen, but they are much more susceptible to drying out and losing their airy structure if not wrapped with extreme care.
5.Why did my cake get sticky after thawing?
This usually happens because the cake was wrapped while still slightly warm, or it was allowed to thaw completely while still inside its plastic wrap. The trapped moisture settles on the surface. To fix this, simply unwrap the cake immediately upon taking it out of the freezer.