
Have you spied a bread so bouncy it looks like it’s levitating right there? Say hello to Ensemada, a Filipino bread so nice, a real standing ovation for baking. This twisty treat feels like a cloud and tastes like butter, poof, it vanishes in your mouth. Like a fancy brioche or milk bread from Japan, Ensemada is a star in the Philippines. Folks love it as a snack or party food, yes. With its funny shape and lots of cheese with sugar, it’s a treat you won’t forget quickly. We’ll show you all the cool stuff about this bread, from way back when to how we eat it now.
Tracing the Rich History of This Sweet Bread
The tale of Ensemada is like food art, mixed with Spain’s old days in the Philippines. Its name and swirls come from Spain’s “Ensaimada” , a baked treat. But Filipino bakers spun the recipe, making their own awesome thing. They used stuff from around their home and new tricks for the warm weather, making a bread richer and sweeter than the old one. This switch from a Spanish thing to a fave food shows how eats can jump around and change. It sticks with the culture and families of a whole land, loved from old folks to young ones.
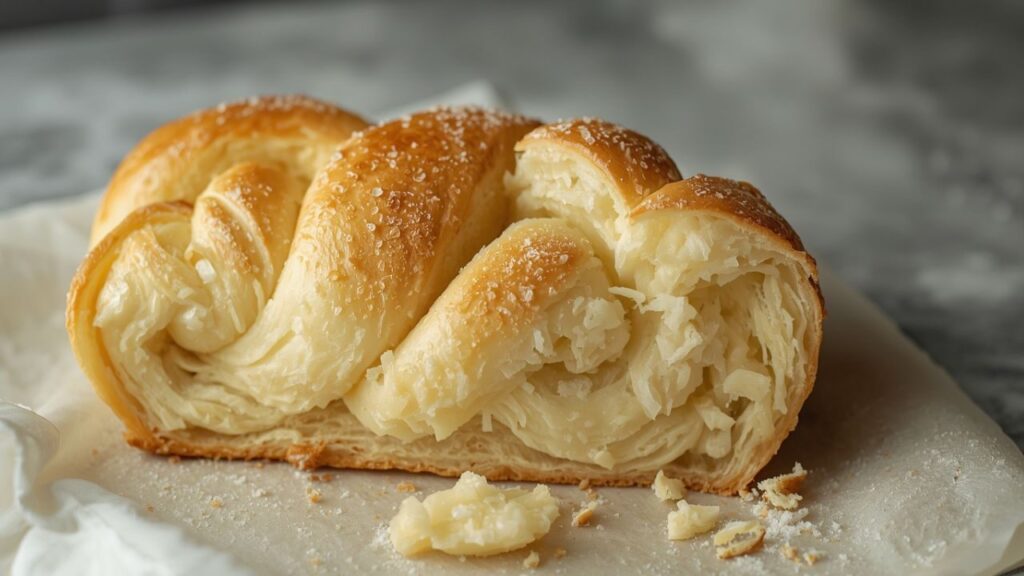
What Gives the Ensemada Its Signature Texture?
Its soft, cloud-like vibe comes from how Ensemada cooks and what’s mixed inside of it. Items like eggs, milk, and butter help make this bread pretty soft and quite tasty. Though, the real magic is a slow rise, done maybe more than once. This makes little air spots all through it. This slow rise gives it body and a nice, light zing. Baking it makes a bread that’s super soft and bouncy. It tears apart easily, making each bite a happy, full feeling that you’ll enjoy from the start.
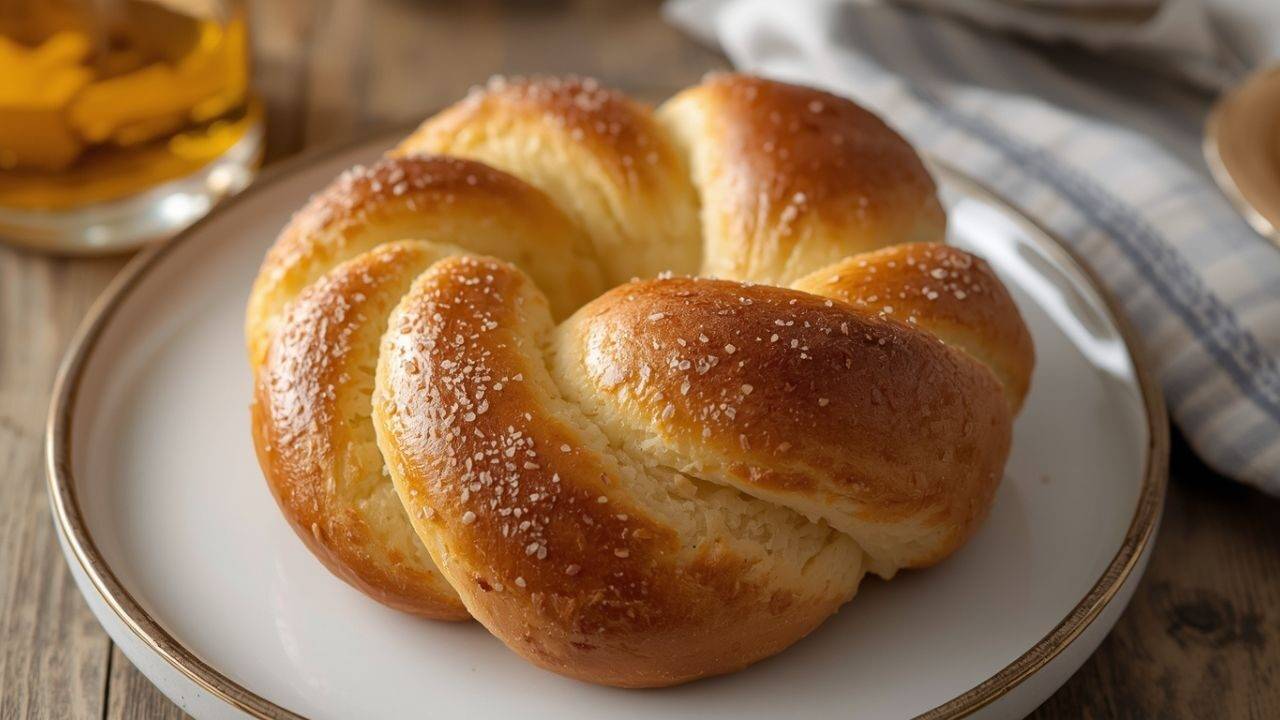
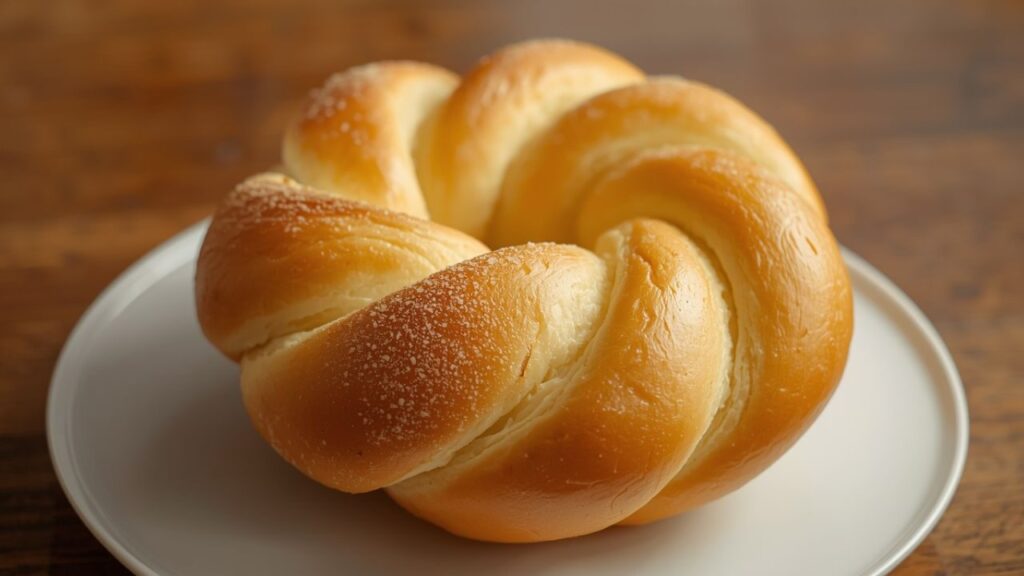
The Classic Shape and Its Meaning
You know Ensemada by its twisty, swirl look. It’s made by rolling the dough into a long string. Then, you curl it from the middle out, like a snail in a circle. This shape is useful, making layers that come apart smooth. The swirl often stands for long life and the never-ending circle of life. It is great for New Year’s and happy times when luck is in the air. Before baking, a bit of egg brushed on makes it shine gold and look tasty.
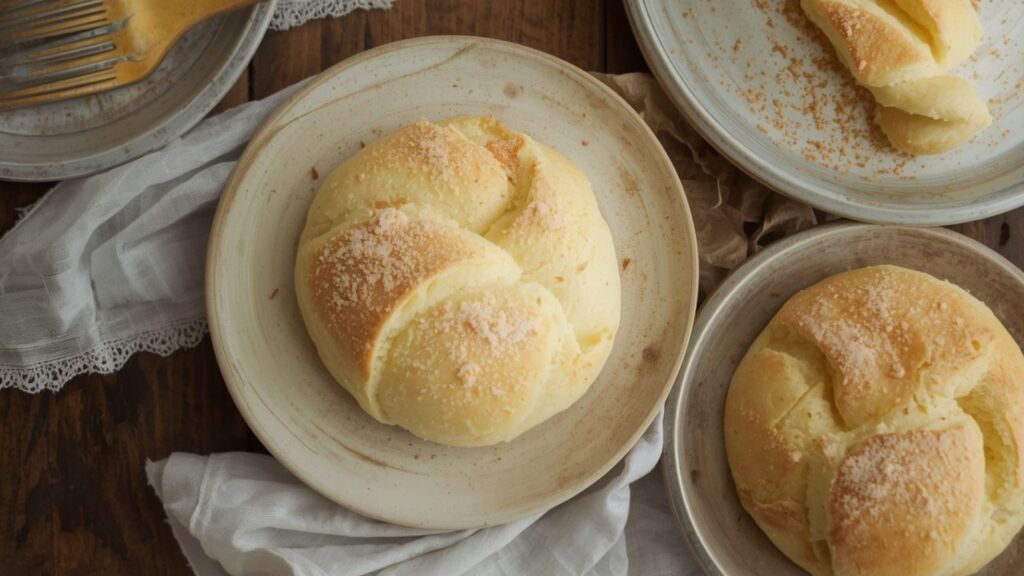
Exploring Traditional and Modern Toppings
A warm-from-oven bread is nice by itself, yet the extras often make it super great. The main classic thing is lots of shaved Edam or ball cheese plus white sugar. That sweet and salty mix makes a great taste that you will want more of. At bakeries now, some have it spread with soft butter cream, yam spread, or even sweet jelly coconut. A few put a cut salted egg up top for a taste that has many parts. If you pick old cheese or some new take, the add-on is key to the bread trip, giving one more taste and feel to the soft bread part.
How to Enjoy an Ensemada the Traditional Way
Loving bread is a light joy, yet some tips help to love it like those from here. That sweet bread is often eaten as a snack, the Pinoy day snack, often with warm, deep hot cocoa or new brewed coffee. The cool way to eat it is to pull it bit by bit, loving the soft, like butter parts one by one. It is cool to eat on the same day it is made when the feel is super, but can be warm in an oven to help it feel new. For a real taste, seek a Pinoy bake spot, or “bread place,” where the bread is baked in fire ovens, with more of a smoke taste you miss at home.
Finding the Perfect Ensemada Near You
To grab real Ensemada, look for a Filipino bake shop in your city or close by. These shops keep old recipes safe, giving you a true taste and feel. Some also sell to Filipino food stores, so peek at their bake section too. Now, many small bake businesses also sell Ensemada online or deliver locally, giving a fresh product. Check reviews and photos to find a good seller of this tasty pastry.
The Cultural Significance of Ensemada in Filipino Celebrations
Ensemada is super special in Filipino culture, it is more than a snack. This pastry shows up at big parties like Christmas and family meets, its swirl means good luck and life going on. People give it during holidays, in nice boxes showing it is loved. Sharing Ensemada with people is like giving warmth and kindness, which Filipinos love. Seeing it at big events makes them feel special, tying family together through food and memories that stick around.
The Art of Making Ensemada Dough from Scratch
Making great Ensemada bread needs calm, exact steps, and knowing how stuff mixes for that special feel. It starts with waking up yeast inside hot milk, so it bubbles before mixing in flour, sugar, eggs, plus soft butter. Good dough squishing is super important and needs real focus, like 15-20, to get gluten that can hold air as it rises. The dough then gets its first rest, which takes hours, until it gets twice as big in a cozy, wind-free spot. After this rest, cut the dough, make it like long snakes, and twist it into swirls before its last rise. This picky thing, even though long, turns easy stuff into the cool, light pastry that makes Ensemada great.
Regional Variations of Ensemada Across the Philippines
Even though Ensemada is mostly the same around the country, different spots have made their own cool takes on this old treat. A few bakers twist it by mixing coconut milk instead of the usual milk, which gives bread island vibes. Some spots may stir in sweet bits of coconut (macapuno) or purple yam (ube) inside the twisty layers before it bakes. The size changes a lot too, from small pieces just for one person to big ones for families to share at parties. These place-based changes show how creative Filipino bakers are and how they’ve changed Ensemada to use local tastes, making each kind special to their town.
Pairing Beverages with Your Ensemada Experience
Picking that one drink to go with your Ensemada makes the whole snack time feel cooler, like it unlocks some extra tasty thing hiding inside. Often, folks sip dark hot cocoa that is Filipino, or tsokolate, because its bold taste makes sweet bread taste nicer. Strong coffee, with a splash of milk, gives a kick, fighting any bread, cheese feeling in your mouth. Cold milk works if you want to keep things easy; it makes the creamy part of the Ensemada shine like a star. Some hip cafes now use milk tea or fruity tea that is soft which matches the bun’s quiet taste and makes you feel happy and not thirsty all at once.
Storing and Reheating Your Ensemada Properly
Keeping your Ensemada just right and warming it up the right way matters if you are trying to get all of its yummy goodness. If you’re going to eat it soon, like within a day, a paper bag is fine because it keeps the outside snappy and inside soft. If you must keep it longer, like three days, a sealed box stops it from getting hard, even though it changes a tiny bit. To freeze it so you can eat it much later, wrap it tight in plastic and foil; then, it stays good for about two months. Don’t use a microwave because it makes the bun angry; use an oven at 300°F for just a bit to bring back its special smell and nice softness.
The Evolution of Ensemada in Modern Filipino Bakeries
Filipino bakeries now oddly cherish Ensemada. They are making versions that are cool and suit diets. Many stores sell tiny ones, great for get-togethers or trying many tastes. There are huge ones for family fun. Healthy tweaks use wheat or less sugar, yet old ways are still liked best. Some cooks made salty kinds with garlic, turning Ensemada into more than just sweets. Still, its soft bread and swirl stay the same. It shows old and new can mix, keeping food alive for all eaters.
Ensemada vs. Other Pastries: Your Quick Comparison Guide
Ensemada against other breads? Here is a quick look to see the differences of Filipino desserts.
| Feature | Filipino Ensemada | Spanish Ensaimada | Brioche | Japanese Milk Bread |
| Origin | Philippines (Spanish-inspired) | Mallorca, Spain | France | Japan |
| Texture | Extremely soft, fluffy, airy | Light, flaky, pastry-like | Rich, tender, buttery | Super soft, moist, pull-apart |
| Signature Topping | Grated cheese & sugar | Powdered sugar | None or light glaze | Often plain or light glaze |
| Sweetness Level | Medium-sweet | Mildly sweet | Slightly sweet | Mildly sweet |
| Best For | Afternoon snacks, celebrations | Breakfast, light snack | Breakfast, French toast | Sandwiches, toast |
| The Vibe | Festive, comforting, communal | Simple, elegant, traditional | Rich, indulgent, classic | Soft, versatile, modern |
Pro-Tip: Enjoy Ensemada right after baking for an awesome experience. The great, airy feel peaks fresh from the oven. Store it? Gently heat before eating to revive that just-baked softness. The sugary cheese crust gets lightly crunchy with soft bread for a cool mix.
Conclusion
The pastry Ensemada goes beyond; it’s a soft, oily, and sugary sign of Filipino food customs plus change. It shows a sweet combo of old times, arts, and pure baking skill honed over years. From Spain to unique Filipino traits, each bite shares tales of custom and kin. Enjoy with cheese, new ube, or bare, Ensemada gives joy. Next time you spot this looped bread, try one now, see why it’s been liked for ages, making happy snack days around the Philippines.
FAQs
1. What does Ensemada taste like?
Ensemada tastes like a sweet, oily cloud shape. It has super soft, airy feels like brioche bread, with a rich, lightly sweet taste. The old kind is covered with cheese and sugar, making the best sweet-salty mix.
2. Is Ensemada eaten as dessert or bread?
It is truly both things. In the Philippines, Ensemada is used as a snack time with coffee or warm cocoa. It feels very sweet like a good treat, but still fills you well for food eating times.
3. What’s the difference between Ensemada and Spanish Ensaimada?
Though both swirl like unbelievable, the Ensemada from the Philippines is usually more soft, sugary, and full of flavor compared to the one from Spain. Often, the Filipino type has things on top, like cheese, sweet cream, or purple yam, but the Spanish one is plain with just sugar dust.
4. Can I find Ensemada outside the Philippines?
Yep, you can get them at Filipino bread shops all over. Plenty of cities with Filipinos have stores that bake Ensemada fresh each day. You might see them where they sell Asian food or from Filipino food sellers on the web.
5. What are the most popular Ensemada toppings?
Yep, you can get them at Filipino bread shops all over. Plenty of cities with Filipinos have stores that bake Ensemada fresh each day. You might see them where they sell Asian food or from Filipino food sellers on the web.