
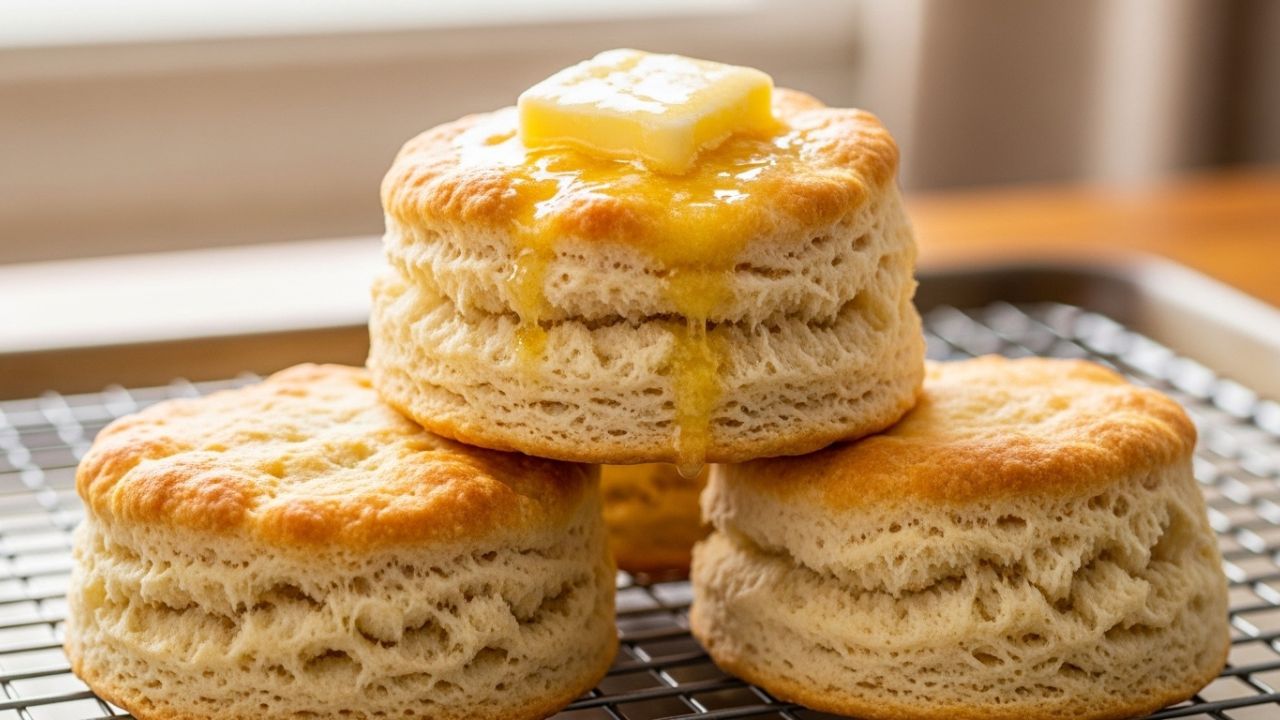
There is a specific kind of magic that happens in a kitchen when the scent of browning butter and toasted flour begins to waft from the oven. For many of us, a warm biscuit is more than just a side dish; it is a memory of slow Sunday mornings, flour-dusted countertops, and the kind of comfort that only Southern soul food can provide. Achieving that elusive shatteringly crisp exterior paired with a pillowy, cloud-like center has become a rite of passage for home bakers. I remember the first time I tried to tackle a buttermilk biscuit recipe; I ended up with hockey pucks because I was far too aggressive with the dough. It took years of trial, error, and a lot of messy aprons to realize that making a great biscuit isn’t about strength—it’s about temperature and touch.
The beauty of a biscuit lies in its simplicity. You don’t need fancy equipment or rare ingredients. You just need a few pantry staples and a little bit of technique. Similarly, dishes like Pork Chop Supreme highlight the same soul-satisfying, comfort food principles. Before you start preheating your oven, you might want to take a look at how to stock your pantry for Southern baking to ensure you have the right flour and fats on hand for the best possible results. When you master this craft, you aren’t just making bread; you’re creating a vessel for honey, jam, or savory gravy that can turn any ordinary meal into a feast.
The Shortlist
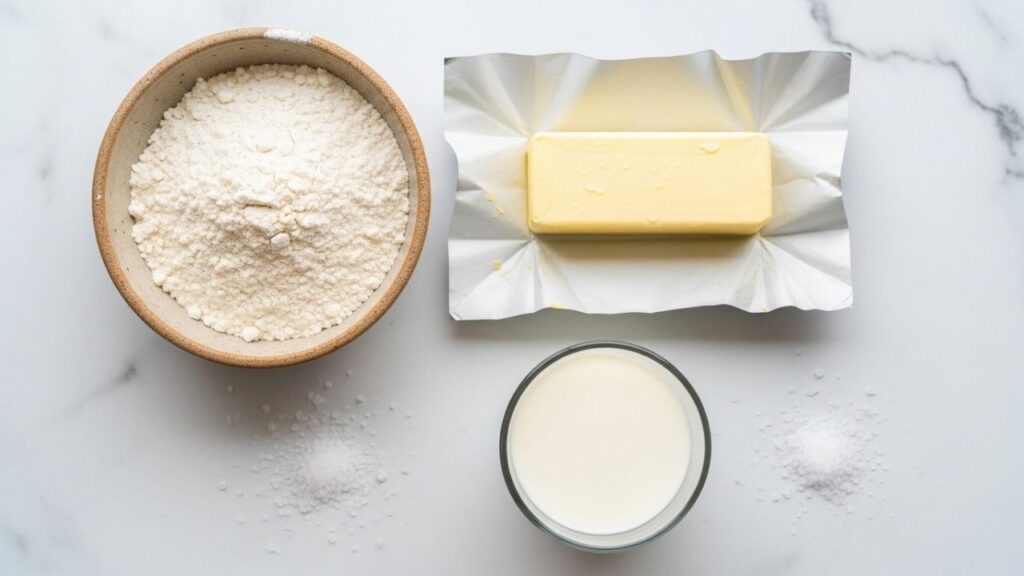
To get those sky-high layers, every ingredient must serve a purpose. We are looking for high fat and high acidity to create the chemical reaction necessary for a perfect rise.
- All-Purpose Flour: Look for a brand with a moderate protein content. Too much protein (like in bread flour) will make your biscuits tough.
- Unsalted Butter: It must be cold. Not room temperature, but just pulled from the back of the fridge cold.
- Real Buttermilk: The acidity in buttermilk reacts with the leavening agents to create bubbles. According to the King Arthur Baking guide on ingredient science, the lactic acid in buttermilk also helps tenderize the gluten, ensuring a softer crumb.
- Baking Powder and Baking Soda: We use both to ensure a powerful lift and beautiful browning.
- Salt and a Touch of Sugar: The sugar doesn’t make it sweet; it simply rounds out the tang of the buttermilk.
Equipment Essentials
You don’t need a stand mixer. In fact, your hands or a simple pastry cutter are much better. You will also need a sharp-edged biscuit cutter—avoiding the temptation to use a drinking glass, which seals the edges and prevents the biscuit from rising.
From Flour to Flakiness
1. The Sandy Stage
Start by whisking your dry ingredients in a large bowl. Once combined, take your cold butter and either grate it with a box grater or cut it into small cubes. Incorporate the butter into the flour using a pastry cutter or your fingertips until the mixture looks like coarse crumbs with some pea-sized chunks of butter remaining. Those chunks are vital; they create the steam pockets that produce layers.
2. The Hydration
Create a well in the center of your flour mixture and pour in the cold buttermilk. Use a wooden spoon or a spatula to gently fold the mixture until it just comes together. It will look shaggy and a bit messy—that is exactly what you want. If you find yourself enjoying this process, you may also want to explore tips for perfecting homemade yeast breads to expand your baking repertoire beyond the world of quick breads, or check out 5 Secrets to Master Homemade Gourmet Salad Recipes for more delicious homemade dishes.
3. The Secret Letter Fold Technique
Turn the dough out onto a floured surface. Gently pat it into a rectangle. Fold the dough in thirds, like a letter, then rotate it and repeat the process 3 or 4 times. This is called laminating. Each fold creates a new layer of butter and dough. Finally, pat the dough down to about an inch of thickness.
4. The Clean Cut
Press your biscuit cutter straight down into the dough. Do not twist. Twisting the cutter sears the edges of the dough together, which will trap the steam and keep your biscuits short and squat. Place them on a parchment-lined baking sheet so they are just touching; this helps them climb upward rather than spreading outward.

Essential Specs for Success
| Category | Details |
| Prep Time | 20 Minutes |
| Cook Time | 12–15 Minutes |
| Total Time | 35 Minutes |
| Serving Size | Makes 8–10 large biscuits |
Pro Tips for the Home Baker
- Freeze Your Butter: Grating frozen butter directly into the flour is a game-changer. It keeps the fat cold longer, which is the number one secret to a flaky buttermilk biscuit recipe.
- Chill the Dough: If your kitchen is warm, pop the tray of unbaked biscuits into the freezer for 10 minutes before sliding them into the oven. A cold biscuit hitting a hot oven creates an explosion of steam.
- The Golden Finish: Brush the tops with melted butter or a bit of extra buttermilk right before baking to achieve that picture-perfect golden-brown crust.
Storing and Bringing Biscuits Back to Life
Biscuits are undoubtedly best eaten within twenty minutes of leaving the oven. However, if you have leftovers, they can be kept in an airtight container at room temperature for about two days. To Reheat: Please, skip the microwave! It turns the delicate fats into a chewy, rubbery mess. Instead, wrap your biscuits in aluminum foil and place them in a 350°F (175°C) oven for about 5–8 minutes. This restores the crispness of the exterior while keeping the inside moist. If you are planning a large brunch, knowing how to prep breakfast dishes in advance can save you a lot of stress when you’re trying to get these to the table hot.

Creative Ways to Serve Your Masterpiece
While a pat of butter is the gold standard, don’t stop there. A split biscuit is the perfect base for a fried chicken breast and hot honey. You can also drop these into a cobbler for a dumpling style dessert or use them to soak up a hearty beef stew. For a classic Southern breakfast, nothing beats a ladle of thick sausage gravy poured over a split, toasted biscuit. If you’re craving a different type of comfort food, you might enjoy the authentic flavors offered at Red Apple Chinese Restaurant.
Conclusion
Mastering a classic buttermilk biscuit recipe is a rewarding journey that connects you to generations of home cooks. It is a lesson in patience and the power of simple ingredients. Once you see those layers pull apart and steam rises from the center of your first successful batch, you’ll never go back to the store-bought cans again. The kitchen might be a bit messy with flour by the end, but the results are worth every crumb. So, grab your butter, keep it cold, and get baking—you’re just 35 minutes away from the best biscuit of your life!
Frequently Asked Questions
1. Can I use a milk substitute if I don’t have buttermilk?
While real buttermilk biscuit recipe is best for texture, you can make a cheat version by adding one tablespoon of lemon juice or white vinegar to a cup of whole milk. Let it sit for five minutes until it curdles slightly before using.
2. Why are my biscuits flat?
Flat biscuits usually happen for two reasons: either your baking powder is expired, or you twisted the biscuit cutter when cutting the dough. Make sure your leavening agents are fresh and always lift the cutter straight up.
3. Can I freeze the unbaked dough?
Yes! This is a fantastic time-saver. Cut the biscuits and freeze them on a tray, then transfer them to a freezer bag. You can bake them straight from frozen; just add an extra 3–5 minutes to the total baking time.
Henry James is the writer behind Fooodies.site, where he shares easy recipes, practical cooking guides, and simple kitchen tips for everyday home cooks. He enjoys experimenting with flavors and turning everyday ingredients into delicious, homemade meals. His goal is to make cooking feel simple, enjoyable, and achievable for everyone. He focuses on creating clear, well-tested content that readers can trust and follow with confidence.