
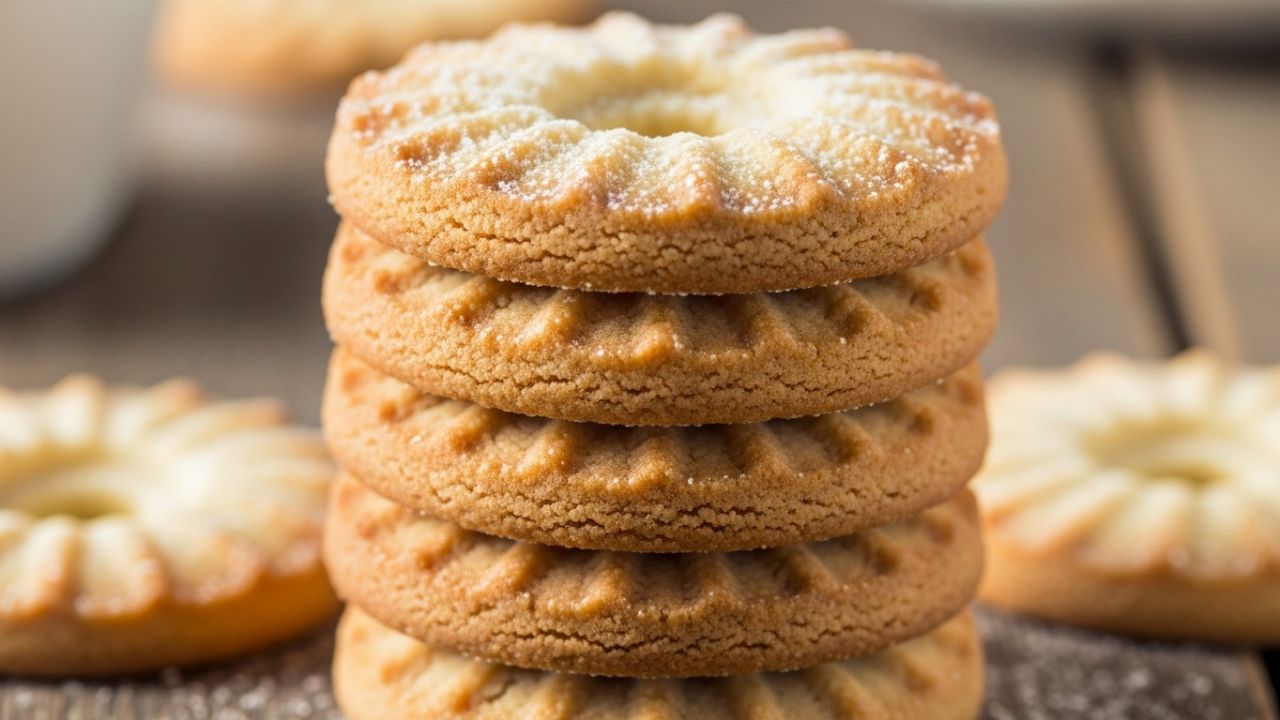
There’s something timeless about a tin of classic butter cookies. traditional cookie recipes No frosting, no sprinkles—just golden edges, delicate ridges, and a rich buttery aroma that fills the kitchen as they bake. Butter cookies may look simple, but they require precision. Small adjustments in butter temperature, mixing time, and flour ratio can completely change the final texture. After multiple test batches, I’ve found that consistency and technique matter more than complexity. This recipe is designed to give you cookies that hold their shape, bake evenly, and melt in your mouth every time.

Why Butter Cookies Taste So Different
Butter cookies are often confused with sugar cookies or shortbread, but they sit somewhere in between.
Here’s how they compare:
- Sugar Cookies: Sweeter, often softer and sometimes chewy
- Shortbread: No eggs, very crumbly and rich
- Butter Cookies: Light, structured, and delicately crisp with egg yolks for balance
The key difference lies in fat ratio and mixing technique.
In baking, short refers to how fat interferes with gluten formation. Less gluten means a more tender, melt-in-the-mouth texture, which is exactly what butter cookies aim for.lling gluten development is the single most important factor in getting that sandy, delicate texture instead of something tough.
Ingredients (Precision Matters Here)
With only five core ingredients, every detail matters.
- 1 cup (226g) unsalted butter, cool room temperature
- 3/4 cup (90g) powdered sugar
- 2 large egg yolks, room temperature
- 2 cups (240g) all-purpose flour
- 1 teaspoon vanilla extract or vanilla bean paste
- Optional: 1/4 teaspoon fine salt
Ingredient Insights from Testing
- Butter: Best results come from butter around 18–20°C (65–68°F). If it becomes greasy or overly soft, the cookies may spread. European-style butter adds extra richness.
- Powdered Sugar: Creates a finer texture compared to granulated sugar due to its light cornstarch content.
- Egg Yolks: Only yolks are used because they add richness and binding power without excess moisture from egg whites.
- Flour: All-purpose flour works best. Higher-protein flour can make cookies dense and heavy.

Step-by-Step Method for Perfect Results
1. Creaming Is Structural, Not Just Mixing
Beat butter and powdered sugar for 3–4 minutes until light and fluffy. This step incorporates air, which helps create a delicate texture. Undermixing leads to dense cookies, while over-soft butter can cause spreading.
2. Add Yolks and Vanilla
Mix until fully combined. Scrape the bowl to ensure even texture. The dough should look smooth and creamy.
3. Add Flour Gently
Mix on low speed just until the flour disappears. Avoid overmixing, as it develops gluten and makes cookies tough. Finishing by hand helps maintain control.
4. Chill for Stability
Wrap the dough and chill for at least 30 minutes, or explore how to freeze cookie dough for freshness for longer storage and make-ahead baking strategies.
Chilling helps:
- Firm the butter
- Improve flavor
- Prevent spreading
- Hydrate flour evenly
5. Shaping Techniques
You can shape the cookies in different ways:
- Slice from a chilled dough log
- Pipe using a star tip for decorative ridges
- Press lightly with a fork for a rustic finish
Piped cookies tend to hold their shape best when the dough is slightly cool but pliable.
6. Bake with Intention
Preheat oven to 175°C (350°F). Bake for 10–12 minutes until the edges are lightly golden and the centers remain pale. Remove from the oven at the right moment—the cookies will continue to firm up as they cool. For general baking safety and guidance, refer to trusted food safety resources such as the USDA Food Safety and Inspection Service.

Flavor Variations
Once you master the base recipe, you can customize it easily: Spiced Version: Add cinnamon or cardamom Lemon Butter Cookies: Add lemon zest Almond Version: Replace vanilla with almond extract Chocolate-Dipped: Dip half in melted chocolate
Common Butter Cookie Mistakes
1. Spreading Too Much
Butter was too soft or dough wasn’t chilled enough.
2. Dense Texture
Overmixing or too much flour.
3. Burnt Edges
Oven too hot or tray placed too low.
4. Dough Too Stiff
Butter too cold—let it soften slightly.
5. Dough Too Soft
Needs more chilling time, especially in warm climates.
Make-Ahead Timeline
1–2 Days Ahead: Refrigerate dough Up to 3 Months: Freeze dough logs Same Day: Bake fresh for best aroma and texture Flavor’s often deepen after resting overnight.
Storage Tips for Maximum Freshness
Store baked cookies in an airtight metal tin for up to 7 days. For more dessert preservation insights and finishing ideas, see chocolate pairing and storage tips to keep treats fresh and flavorful. Freeze sliced dough for fresh baking anytime Freeze baked cookies with parchment between layers Avoid plastic containers if you want to preserve crisp edges.
Serving Pairings
Butter cookies pair beautifully with:
- Black tea
- Espresso
- Hot chocolate
- Fresh berries
- Vanilla ice cream sandwiches
They also make excellent homemade gifts.rings.
Final Thoughts
Butter cookies may look simple, but they reward careful technique. Temperature, mixing time, and chilling all play a major role in the final texture. Once you understand the base method, you can easily adapt it into endless variations—from citrus versions to chocolate-dipped gift tins.
Conclusion
Butter cookies are a reminder that simplicity in baking often hides the most technical precision. What seems like a short ingredient list actually depends on careful control of temperature, mixing, and timing. When these elements are balanced, the result is a cookie that is crisp at the edges, tender in the center, and deeply aromatic with butter in every bite. From an SEO perspective, butter cookies remain one of the most searched traditional baking recipes because they sit at the intersection of easy homemade cookies, classic cookie recipes, and festive baking ideas.
Their versatility also makes them a favorite for holidays, gifting, and everyday tea-time snacks. What makes this recipe especially reliable is its repeatable structure. Once you understand how butter temperature affects spread, how minimal mixing protects tenderness, and how chilling stabilizes the dough, you can consistently produce bakery-quality results at home. These principles don’t just apply to butter cookies—they extend to many other traditional cookie recipes and shortcrust-style baked goods.
FAQ’s
1. Why didn’t my cookies brown?
Your oven temperature may be slightly low. A small increase or longer bake time may help.
2. Can I use granulated sugar?
Yes, but the texture will be slightly crunchier.
3. Why only egg yolks?
They provide richness without adding excess moisture.
4. Can I make them gluten-free?
Yes, using a 1:1 gluten-free flour blend, though texture may be more fragile.
5. How do I get perfect shapes?
You can gently reshape cookies immediately after baking using a round cutter or glass.
Henry James is the writer behind Fooodies.site, where he shares easy recipes, practical cooking guides, and simple kitchen tips for everyday home cooks. He enjoys experimenting with flavors and turning everyday ingredients into delicious, homemade meals. His goal is to make cooking feel simple, enjoyable, and achievable for everyone. He focuses on creating clear, well-tested content that readers can trust and follow with confidence.